Run Your First Query
Now that you're ready to explore your data, let's dive into writing and running your first SQL query. A Query is a request for data, and SQL allows you to retrieve and analyze information from your tables. In this guide, we'll walk you through running a simple query using the Query page.
Step 1: Navigate to the Query Page
To get started, you’ll need to access the Query module in DataFuse AI:
- From the left navigation sidebar, click on Query.
This will take you to the Query Page, where you can write, run, and manage your SQL queries.
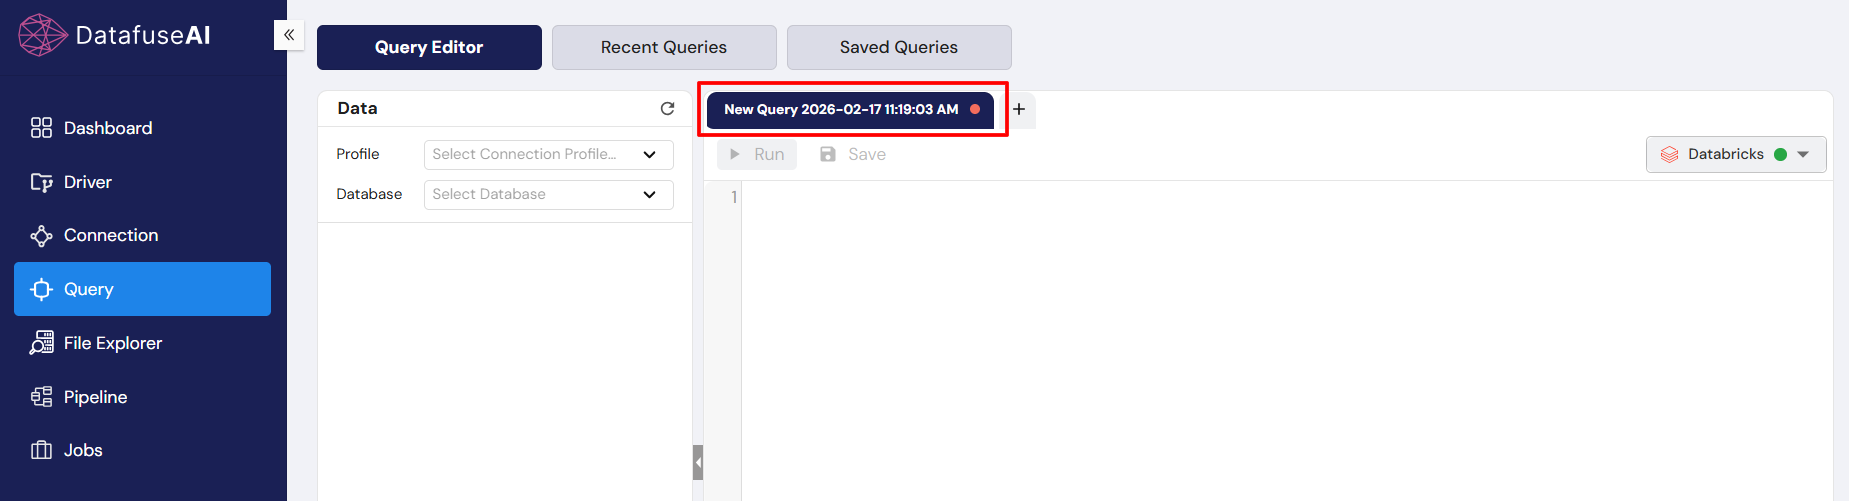
Step 2: Choose the Query Editor Tab
Once you’re on the Query page, make sure you're in the Query Editor tab. You’ll see several tabs at the top, including:
- Query Editor (where you write and run queries)
- Recent Queries (for quick access to queries you’ve run recently)
- Saved Queries (for queries you’ve saved for future use)
The Query Editor tab is where you’ll do most of your work.
Step 3: Select the Connection Profile
Before running a query, you need to connect to the data source by selecting a Connection Profile. Here's how:
-
Choose the Connection Profile from the dropdown list. This is where you'll select the database and schema you're working with.
-
Depending on your data source, you’ll see different hierarchies:
- MySQL Connection Profile: Databases → Tables
- PostgreSQL Connection Profile: Databases → Schemas → Tables
- Upload Connection Profile: Tables only
The available hierarchy depends on the type of connection profile you've selected. For instance, MySQL will show databases,tables while PostgreSQL will display databases, schemas, tables.
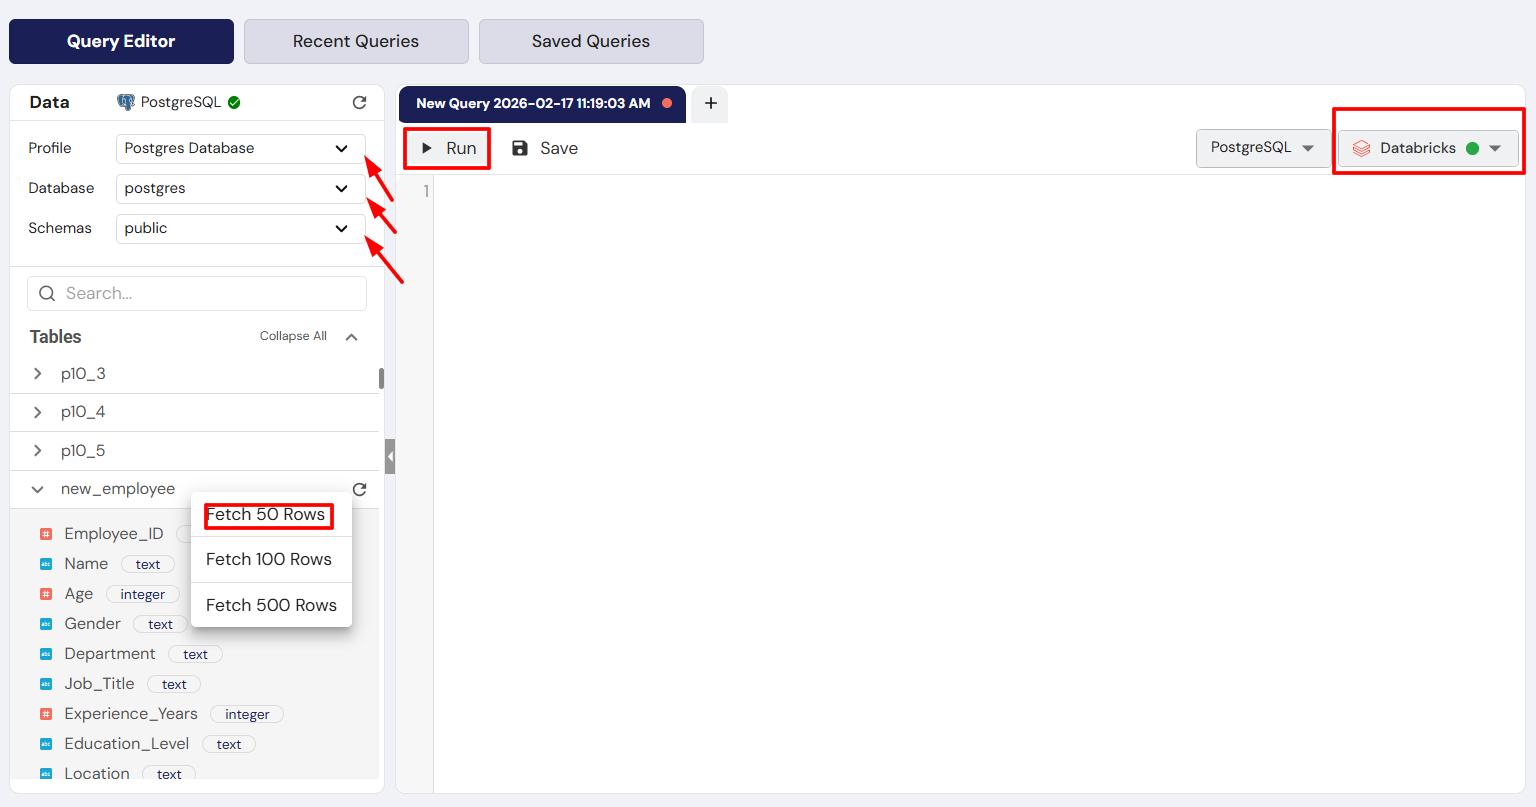
Step 4: Write or Select a Query
Once you’ve selected your connection profile, you’re ready to either write a custom query or explore your data.
- To write your own query: In the Query Editor, type your SQL query. For example: SELECT * FROM your_table LIMIT 10;
- To fetch sample data: Right-click on a table name in the sidebar and select Fetch Sample Data. You can choose to retrieve 50, 100, or 500 rows to quickly preview your data.
Always ensure you have a valid engine selected while running queries. This is crucial for processing your queries correctly.
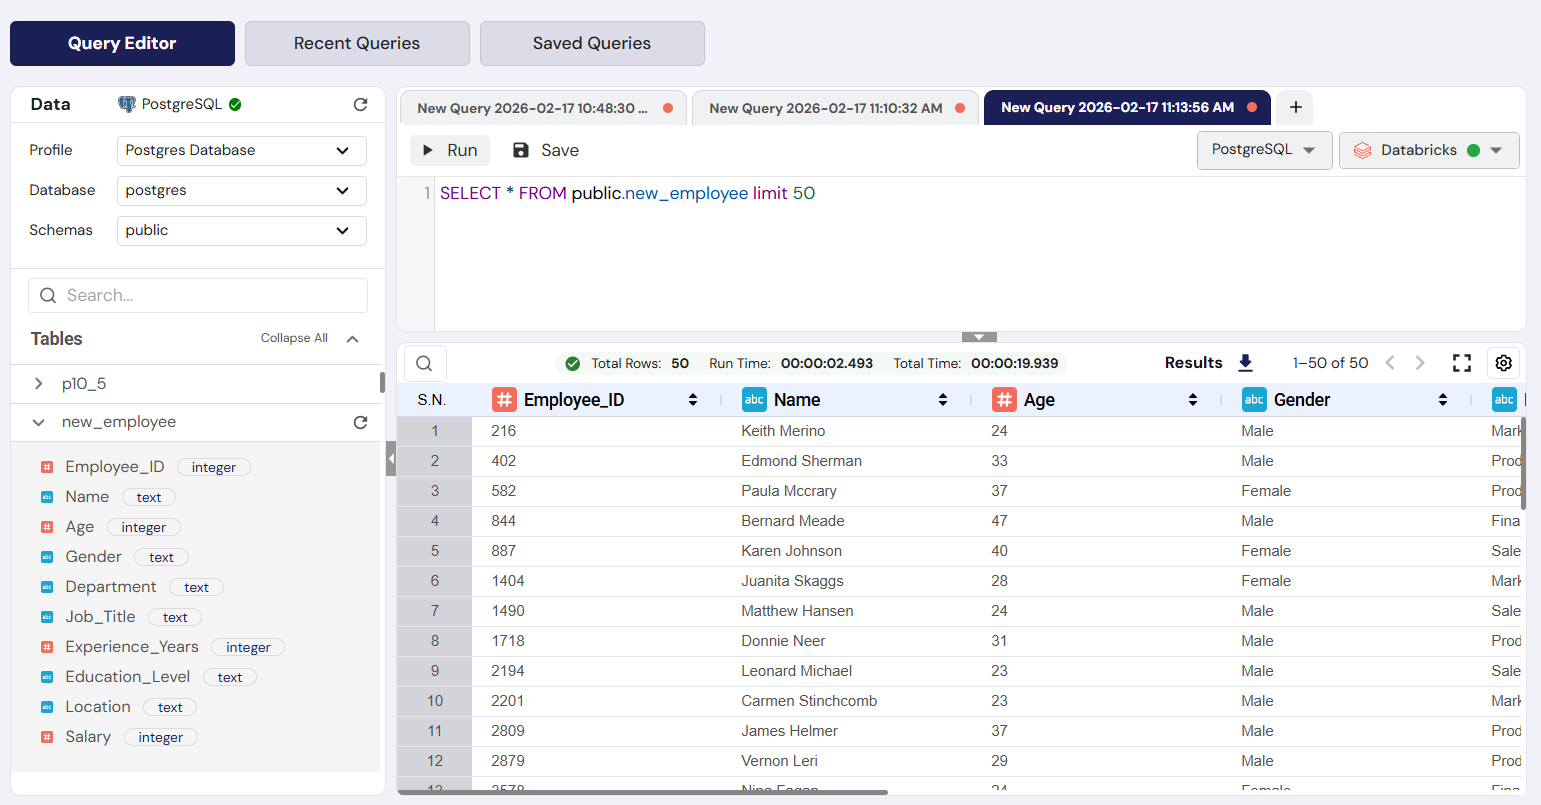
Step 5: Run the Query
After writing or selecting your query, it’s time to execute it:
- Click the Run button .
- The data processing happens in the selected engine, and the results will appear below your query.
Step 6: View or Download the Results
Once the query is executed, the results will be displayed. Here are your options:
- View the Results: Analyze the output directly within the DataFuse AI interface.
- Download the Results: If you want to save the results, you can download them in various formats like CSV or Excel.
Step 7: Save the Query for Future Use
If this is a query you’ll need again, save it for easy access:
- Click the Save button next to the Run button.
- Give your query a name and save it for future use.
Tip: Saving important or frequently used queries will save you time, especially for recurring tasks or reports.
Step 8: Access Recent and Saved Queries
You can easily find past queries:
- Recent Queries Tab: Displays all the queries you’ve recently run. Perfect for quickly revisiting a previous query.
- Saved Queries Tab: Shows the queries you’ve saved. This is where you’ll find your frequently used queries for quick execution.


Next Steps
Now that you’ve successfully run your first query, you’re ready to:
- Explore more complex queries: Write advanced SQL queries to analyze your data.
- Build and execute pipelines: Automate data transformations with data pipelines.
- Create and schedule jobs: Automate tasks by setting up recurring jobs.
For more on running queries, check out the Core Modules -> Query section.
With your first query under your belt, you're all set to dive deeper into DataFuse AI and start unlocking the full potential of your data! Happy querying!