Setup your first engine
In this guide, we'll walk you through the steps to set up and configure your first Engine in DataFuse AI. The Engine is where all your data processing happens, and setting it up is essential to running queries, building pipelines, and automating tasks.
Let’s dive in!
Step 1: Navigate to the Engine Page
To begin, you’ll need to access the Engine page in the DataFuse AI platform.
From the main dashboard, click on the Settings icon in the top right (next to your profile).
- Select Engine from the menu to open the Engine page.

Step 2: Add a New Engine
Once you’re on the Engine page, you’ll add a new engine by following these steps:
- Click the Add New Engine button at the top right corner to begin the setup.

Step 3: Fill in the Engine Details
You’ll now need to fill in the details for your engine. Here are the base fields you’ll encounter:
- Profile Name: Give your engine a custom name (e.g., “Databricks Engine”).
- Provider: Select the engine provider from the available options:
- Databricks
- Livy
- DataFuseAI
Example: Databricks Engine
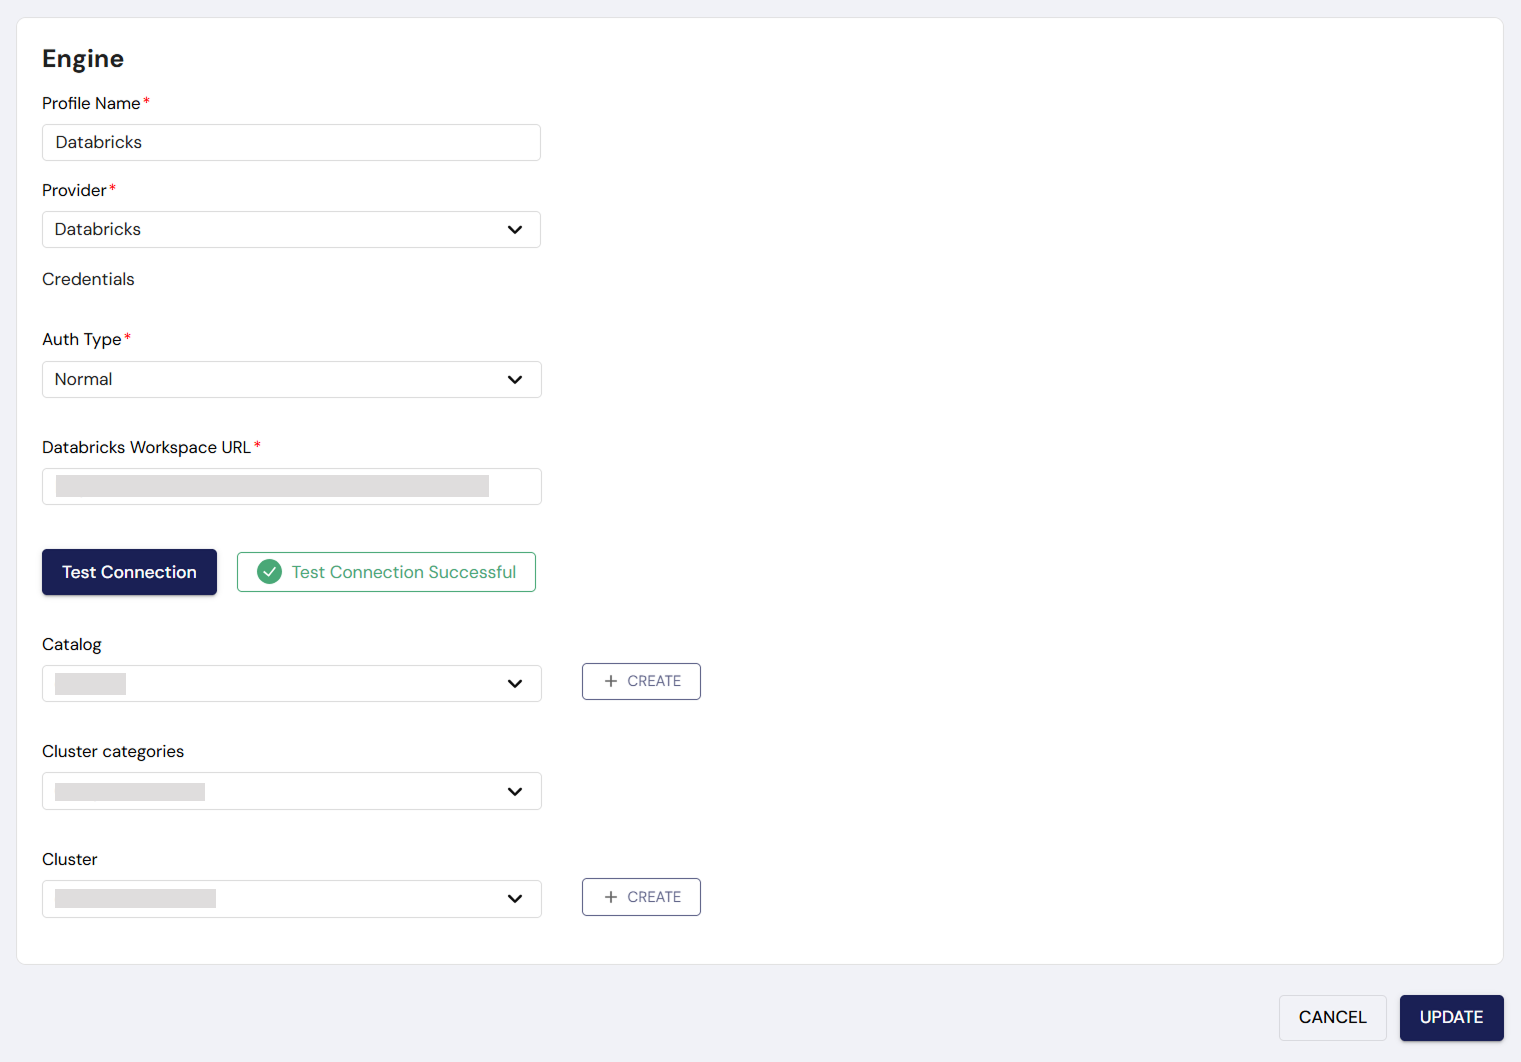
If you select Databricks as the provider, follow these steps:
- Authentication Type: Set it to Normal (this is the default and easiest for quick setup).
- Databricks Workspace URL: Enter the URL for your Databricks workspace.
- Databricks Personal Access Token: Enter your Databricks API token (you can generate this in the Databricks portal).
- Test Connection: Click Test Connection to ensure everything is set up correctly.
Once testing is successful, you’ll see additional options:
- Catalog: Select the Databricks catalog.
- Cluster Categories: Keep it set to Compute Cluster (Default) unless you need a custom setup.
- Cluster: Select an existing cluster, or click Create New to set up a new one.
If you're creating a new Databricks cluster, ensure that it's configured with the appropriate resources for your workload.
Once everything is set, click Save to complete the setup. Congratulations, you've just created your Databricks Engine!
Example: Livy Engine
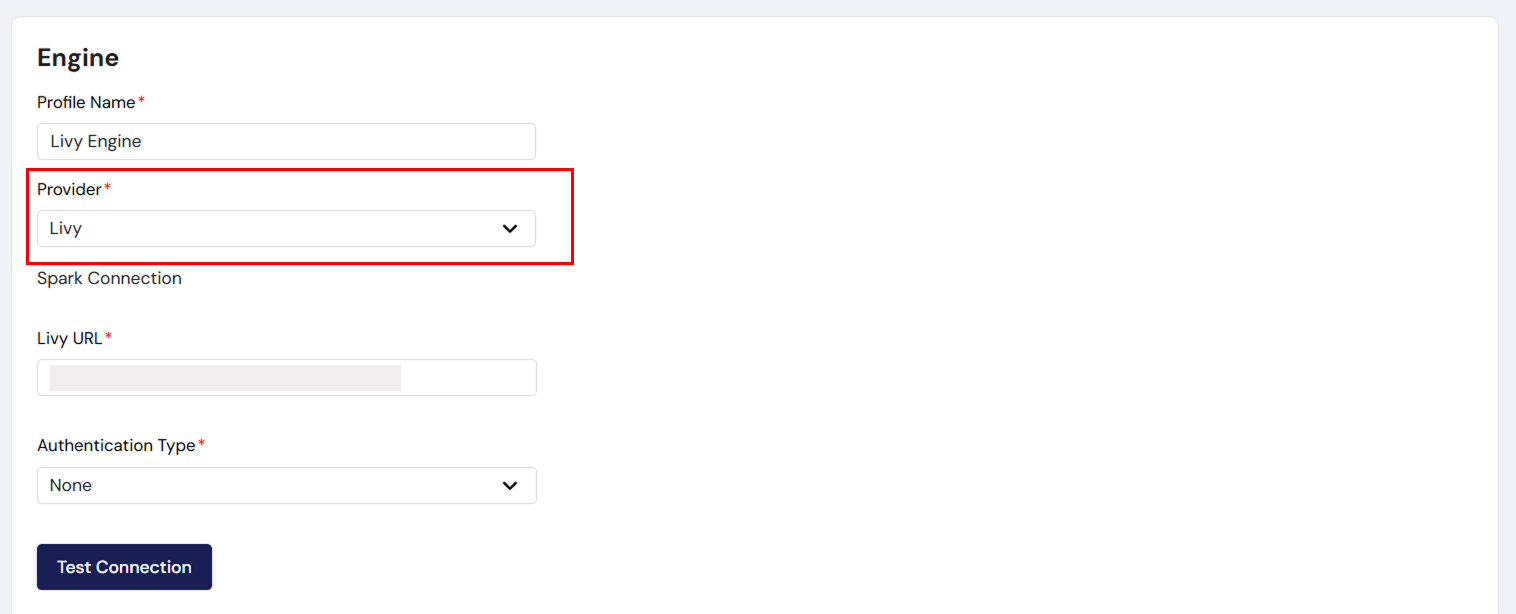
If you choose Livy as the provider, here’s how you’ll proceed:
- Livy URL: Enter the URL of your Livy instance.
- Authentication Type: Choose the appropriate authentication method based on your Livy configuration:
- None: If no authentication is required, leave the password field blank.
- NGINX or LDAP: If authentication is required, enter the username and password for your Livy instance.
- Test Connection: Click Test Connection to ensure that DataFuse AI can communicate with Livy.
Once the connection test is successful, click Save to complete the engine setup.
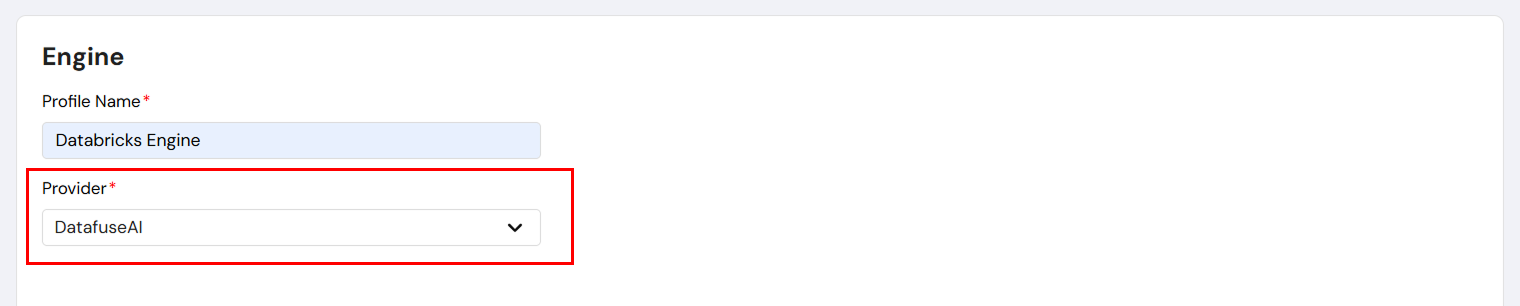
Example: DataFuseAI Engine
If you select DataFuseAI as your provider, you don’t need to configure any settings yourself. Everything is managed and pre-configured by the DataFuse AI team. Just choose DataFuseAI as the provider and hit Save to set up your engine.
Step 4: Finalizing and Using Your Engine
Once you’ve saved your engine, you’re ready to start using it. You can now:
- Run queries
- Build and execute data pipelines
- Create and schedule jobs
With your engine up and running, DataFuse AI will handle the heavy lifting of data processing and management for you.

Next Steps
Now that you’ve set up your engine, you’re ready to explore more features in DataFuse AI. But before you dive into querying, building pipelines, or scheduling jobs, it’s important to first set up your driver and connection profile.
Get to know more on how to:
Once your driver and connection profile are configured, you're ready to:
-
Run Queries
Execute SQL or NoSQL queries to retrieve data from your connected sources. -
Build Pipelines
Create automated data pipelines to streamline and transform your workflows. -
Create Jobs
Schedule and automate the execution of your pipelines and tasks for greater efficiency.
For detailed guidance on each of these steps, check out the relevant sections in Core Modules.
With your engine, driver, and connection profile set up, you’re all set to start processing, analyzing, and transforming your data with the power of DataFuse AI! Enjoy the flexibility and efficiency of your new setup!