Create Your First Connection Profile
In this guide, we’ll show you how to create a Connection Profile to link DataFuse AI with your external data sources, such as PostgreSQL, MongoDB, MySQL, and others. A connection profile stores the necessary credentials for connecting DataFuse AI to your databases or other data sources, enabling you to retrieve and manipulate your data.
Let’s get started!
Step 1: Navigate to the Connection Profile Page
To begin, you’ll need to access the Connection Profile page in DataFuse AI.
From the left-hand navigation sidebar, click on Connection Profile.
Step 2: Add a New Profile
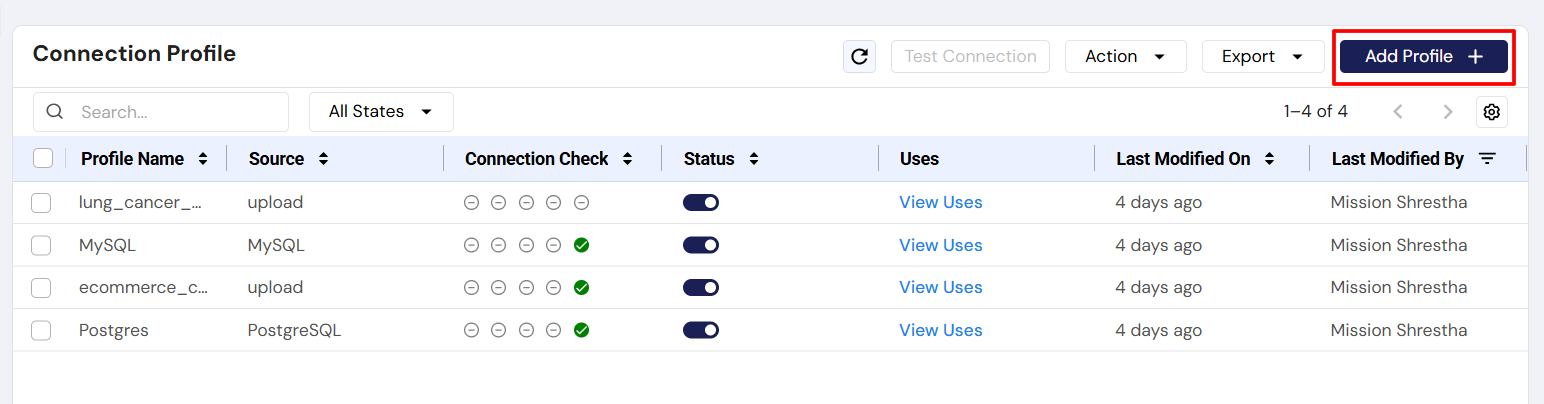
Once you're on the Connection Profile page, follow these steps to create a new connection profile:
- Click the Add Profile + button to begin.
Step 3: Download the Required Driver
Before creating a connection profile, make sure you've downloaded the appropriate driver for the data source you want to connect to. You'll need to download the driver for the specific data source you're connecting to, such as MySQL, PostgreSQL, MongoDB, etc. For detailed instructions on how to download drivers, visit Download Your First Driver.
Supported Data Sources:
- BigQuery
- Cassandra
- MongoDB
- MSSQL
- PostgreSQL
- MySQL
- Snowflake
- S3
- And many more...
Step 4: Fill in the Connection Profile Details
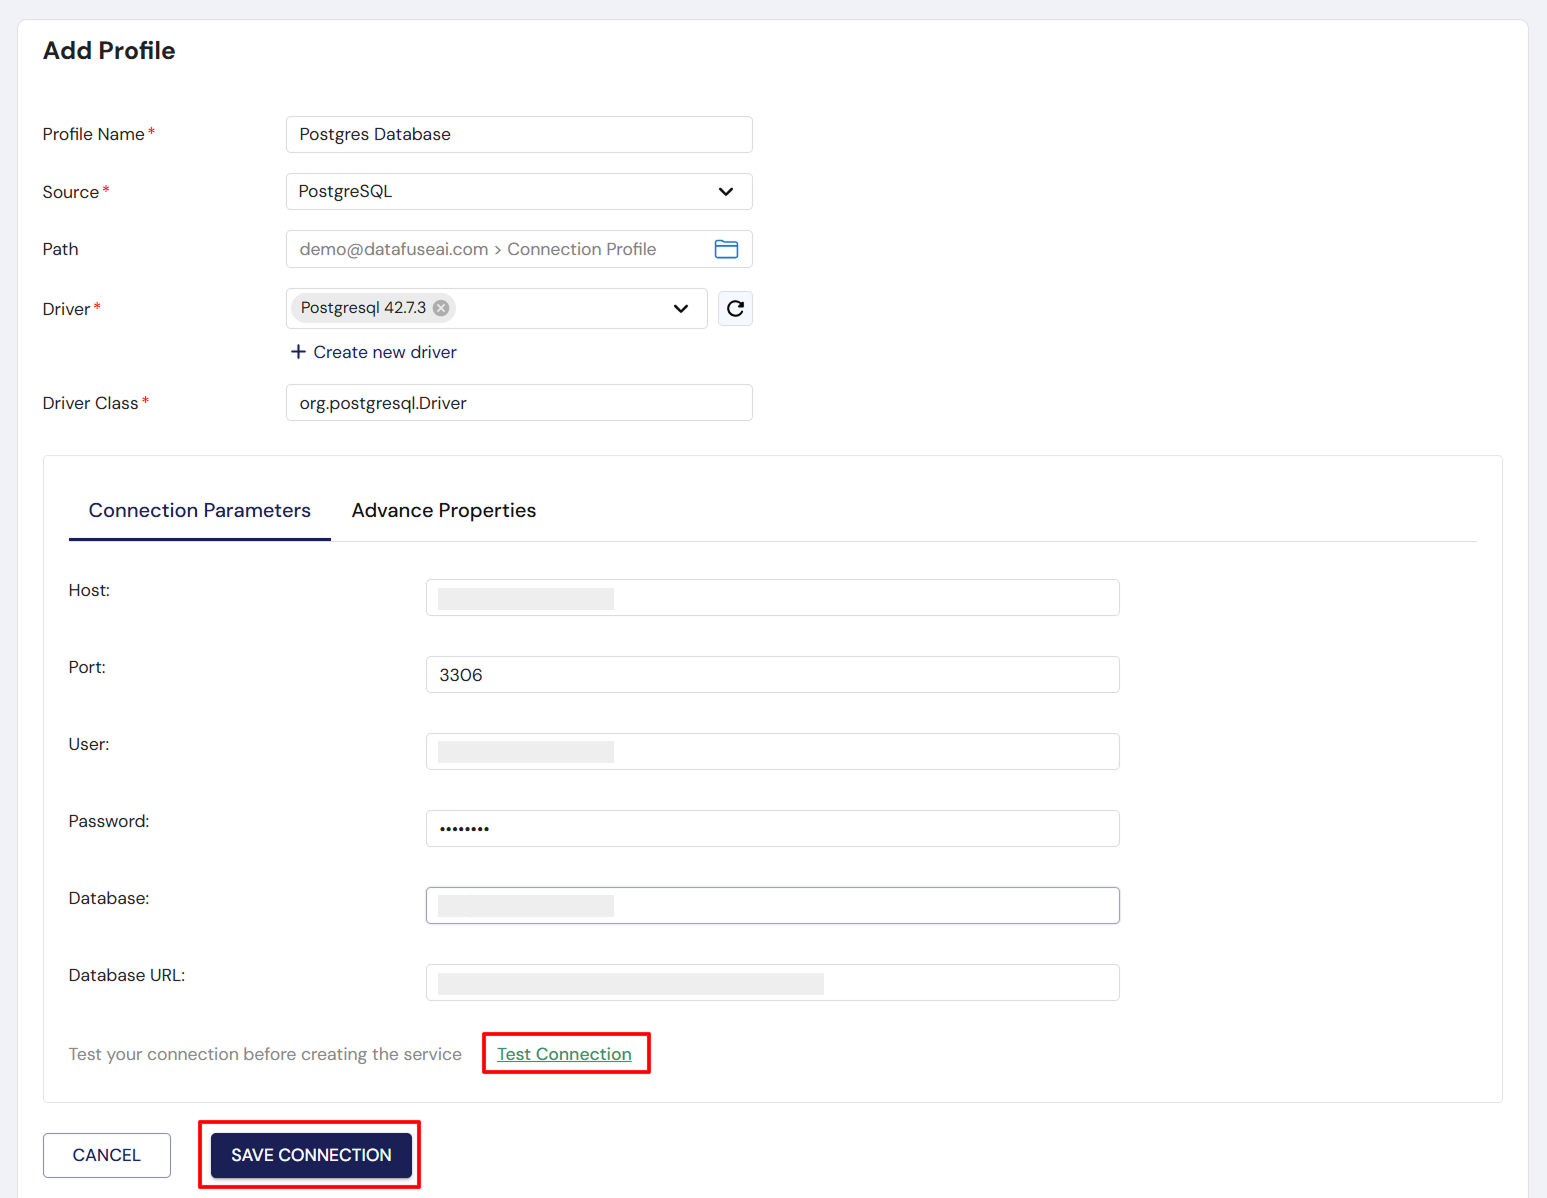
Now that you've downloaded the required driver, you’re ready to fill in the details for your connection profile. Below are the basic fields you’ll need to complete:
Basic Fields to Complete:
- Profile Name: Choose a name for your profile (e.g., “MySQL Connection”).
- Source: Select the data source you want to connect to (e.g., MySQL, PostgreSQL, MongoDB, etc.).
- Path: Path of File Explorer in which the connection profile is saved (default:
/Root/Users->user_email->Connection Profile). - Driver: Choose the driver you downloaded earlier (it will appear in the drop-down list).
- Driver Class: This will be auto-filled based on the driver you selected.
Connection Parameters:
- Host: Enter the hostname or IP address of your data source.
- Port: Specify the port number for the data source (e.g.,
3306for MySQL,5432for PostgreSQL). - User: Enter the username used to authenticate with your data source.
- Password: Enter the password associated with the username.
- Database: Enter the name of the database you want to connect to.
- Database URL: This is auto-filled based on the host and port you enter.
The fields you need to fill out when creating your connection profile will vary depending on the data source you choose.
Sample Connection Profile Info
Here’s an example of how your connection profile might look for a MySQL connection (using placeholder values):
- Profile Name: MySQL-CP
- Source: MySQL
- Path: /Root/Users->mission.shrestha.azminds+234@gmail.com->Connection Profile
- Driver: MySQL Driver (com.mysql.cj.jdbc.Driver)
- Driver Class: com.mysql.cj.jdbc.Driver
Connection Parameters:
- Host: your-database-hostname.com (Replace with your actual database's hostname or IP address)
- Port: 3306 (Default port for MySQL, change if your database uses a different port)
- User: your-username (Enter the username for connecting to your database)
- Password: ••••• (Enter the password for your username)
- Database: your-database-name (Specify the name of the database you want to connect to)
- Database URL: jdbc:mysql://your-database-hostname.com:3306/your-database-name (This URL will auto-populate based on the host and port you enter)
The values in these fields will vary based on your specific database and credentials. Be sure to replace the placeholder values with the actual details for your data source.
Step 5: Test the Connection
Before saving the connection profile, it’s important to test the connection to ensure everything is set up correctly.
Click the Test Connection button to verify that DataFuse AI can connect to your data source.
Always run a connection test before saving the profile to confirm the connection details are correct and the connection is successful.
Step 6: Save the Connection Profile
Once you’ve filled in the required fields and successfully tested the connection, click Save to create your connection profile.
Next Steps
With your Connection Profile successfully created, you’re ready to start using it in DataFuse AI! Now, you can:
- Run Queries: Execute SQL or NoSQL queries to retrieve data from your connected data source.
- Build Pipelines: Create data pipelines to automate the movement and transformation of your data.
- Create Jobs: Schedule jobs to automate your pipelines and other tasks.
For more details on these features, visit the Core Modules sections.
Now that your connection profile is set up, you can seamlessly integrate DataFuse AI with your data sources and start processing, transforming, and analyzing your data!